There are just a handful of ice cream/frozen dessert recipes in Baking and it’s always a nice surprise when one appears on the recipe schedule. This week we made Creamy Dark Chocolate Sorbet. I don’t make sorbet nearly as often as I make regular ice cream because Josh doesn’t typically eat it and it takes me a while to make it through a whole container myself. I figured that since this particular sorbet recipe included nearly half a pound of chocolate, rather than fruit, Josh would happily help me eat it. I was right; as I type this, he is consuming a healthy portion of it.

I was thinking a pound cake would be a nice accompaniment for the dark chocolate sorbet. When I mentioned this, Josh pointed out that I had not made a Bundt cake in a while (totally in a “I like Bundt cakes and we haven’t had one in a while” way, not in a “if you insist on cluttering our cupboards with way too many pans, you should use them once in a while” way); I ended up making a splendid whipped cream cake from Rose’s Heavenly Cakes to pair with the sorbet, and it is an excellent combination. We somehow got backlogged on homemade ice creams - really, a rarity - and we found that the sorbet is also wonderful eaten with buttermilk ice cream.
This is one of those recipes that definitely exceeded my expectations. I did not use exceptionally good chocolate (70% from Trader Joe’s) and was a bit concerned that might be a mistake, as the recipe has so few ingredients; however there were no problems - the sorbet was still delectably rich and uber-chocolaty. I did add a splash of vanilla to the mixture, but made no other changes to the recipe. This recipe rated a 9 for Deliciousness and a 2 for Effort, for an EDR of 4.5. You can find the recipe here on Steph of a Whisk and a Spoon’s site and visit the TWD site to see how the rest of the group fare.
 A number of years ago (yikes, it makes me feel old that I can write phrases like that and have them be true), I spent an afternoon taking a vegan cookie workshop. I lived in Santa Cruz at the time, so it was not an atypical way to spend a weekend afternoon. The class was a lot of fun and the cookies we made were fantastic! But then every time I tried baking vegan cookies in my own kitchen, they turned out terrible - flat, thin messes. It could have been a number of things: the class was a pretty casual affair and we just jotted down the ingredients and instructions, so I could have been off. It could have been my crappy apartment oven. I’m not really sure. I decided butter was better and didn’t look back. Until recently when I picked up a copy of Vegan Cookies Invade your Cookie Jar (and, I will also admit, its companion book Vegan Cupcakes Take Over the World). I have not had any problems with the cookies from that book - other than the fact that it’s almost too easy to make chocolate chip cookies - one bowl, no bringing butter to room temperature - and they all have been fantastic.

I saw a copy of Vegan Brunch at the library recently and decided that I’d try expanding my butter-free baking repertoire into breakfast baked goods. Whenever I check cookbooks out for the library, I put them into one of three categories: 1) I don’t think I would use the book much and won’t end up buying it; 2) Something I might want to have in my collection someday; you know, probably when I need something to get free shipping on an Amazon order or see it discounted; and 3) I “need” it in my collection ASAP. This book falls into the third category, as all three recipes I have made so far have been successful and tasty. I made wonderfully crisp waffles and some excellent pancakes, neither of which Josh would have guessed were vegan if I hadn‘t told him. And I didn’t until after he ate them and said they were wonderful.

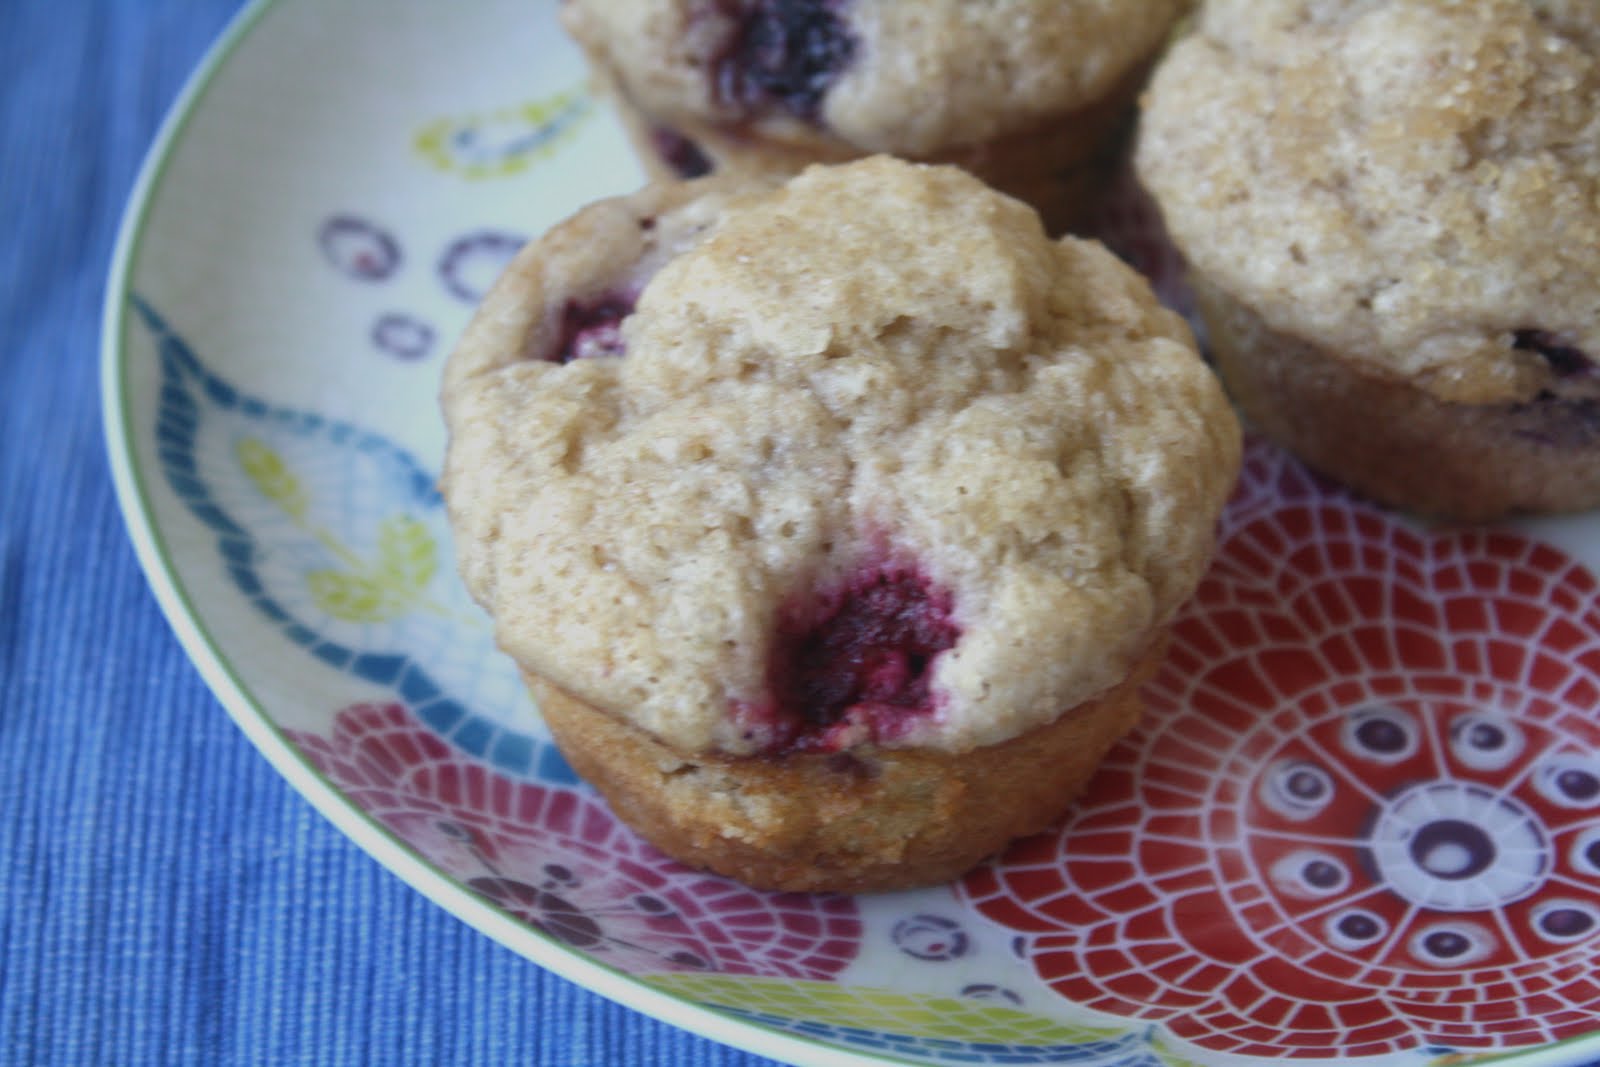
Enough about my cookbook habits and recipes I’m not blogging about, let’s talk about these muffins. The only ingredient this recipe included that I don’t normally have around is soy yogurt, which was not hard to find and is surprisingly good. They are called bakery-style due to the high amount of sugar in them, making them almost like cake. :) I proceeded to make them even more sweet by topping them with crunchy coarse sugar. I did sub some whole wheat flour for about a quarter of the all-purpose, so I think it evens out. I was tempted to use my giant muffin tins to make them even more bakery-esque, but resisted and made them normal size. These soft fluffy muffins definitely brightened up breakfast around here for a few mornings, and were very easy to make. Yay vegan treats!
Bakery-Style Berry Muffins, from Vegan Brunch
2 cups all-purpose flour
3/4 cup sugar
1 tablespoon baking powder
1/2 teaspoon salt
1/2 cup soy yogurt
1/2 cup almond milk (or your favorite nondairy milk)]
1/2 cup canola oil
2 teaspoons pure vanilla extract
1 1/2 cups mixed berries (fresh or frozen)
Preheat the oven to 375 degrees. Lightly grease a muffin tin. In a large mixing bowl, stir together flour, sugar, baking powder, and salt. Make a well in the center and add the yogurt, milk, canola oil, and vanilla. Stir to combine. Fold in the berries.
Scoop the batter into the muffin tin; it should almost fill the entire tin. Bake for 26 to 30 minutes, or until a toothpick or butter knife inserted through the center of the muffin comes out clean. Let cool for a few minutes in the tin, then transfer muffins to a cooling rack to cool completely.
 A couple years ago I was making and blogging about so many different ice creams, I almost thought I should start an all ice cream blog. My enthusiasm for making ice cream has not lapsed, I just have gotten delinquent about posting new flavors (and pretty much anything I make). Also, there have been many flavor repeats. I took advantage of the holiday weekend last week to spend some extra time in the kitchen - seriously, even Josh had trouble keeping up with the output - and one of the things I made that I was particularly excited about was Stracciatella Gelato.

I think I had assumed that since Stracciatella is difficult to say, it would also be difficult to make. Luckily that was not the case at all. It was made with a basic gelato base and then melted chocolate was swirled in at the end. The recipe gives you the option of mixing it by hand or adding the melted chocolate as your ice cream machine is churning at the end, and I opted for the latter. I did need to give the ice cream mixture a couple good stirs after I turned off the machine though, just to ensure the chocolate was well-distributed. There are only two ounces of chocolate, but this method ensures you get crisp bits of chocolate in every bite. This gelato is wonderful on its own, but I will say it is also good paired with really stellar chocolate chips cookies, if you are so inclined. :)

Stracciatella Gelato, from The Ciao Bella Book of Gelato & Sorbetto
Plain Base
2 cups whole milk
1 cup heavy cream
4 large egg yolks
2/3 cup sugar
Stracciatella
1/4 teaspoon vanilla extract
2 ounces bittersweet chocolate, finely chopped
In a heavy-bottomed, combine the milk and cream. Place over medium-low heat and cook, stirring occasionally so a skin doesn’t form, until tiny bubbles start to form around the edges and the mixture reaches a temperature of 170 degrees.
Meanwhile, in a medium heat-proof bowl, whisk the egg yolks until smooth. Gradually whisk in the sugar until it is well incorporated and the mixture is well incorporated and the mixture is thick and pale yellow. Temper the egg yolks by very slowly pouring in the hot milk mixture while whisking continuously. Return the custard to the saucepan and place over low heat. Cook, stirring frequently with a wooden spoon, until the custard is thick enough to coat the back of the spoon and it reaches a temperature of 185 degrees. Do not bring to a boil. [Note: I needed to turn the burner to medium-low, rather than low, as it was taking a very long time to reach 185 degrees.]
Pour the mixture through a fine-mesh strainer into a clean bowl and let cool to room temperature, stirring every five minutes or so. To cool the custard quickly, make an ice bath by filling a large bowl with ice and water and placing he bowl with custard in it; stir the custard until cooled. Once completely cooled, cover and refrigerate until very cold, at least four hours or overnight.
Gently whisk the vanilla into the base. Pour the mixture into the container of an ice cream machine and churn according the manufacturer’s instructions.
While the gelato is churning, place the chocolate in a heat-proof bowl. Set the bowl over a pan of barely simmering water; the bottom of the bowl should be just above the water, not touching it. Stir until just melted. You’re working with a small amount of chocolate, so it will take only a few minutes to melt. Watch closely so it doesn’t overheat, which can cause the chocolate to break up and start to burn. Remove from the heat and cool until just warm, not hot (about 100 degrees). Alternatively, you can melt the chocolate in the microwave: Place the chocolate in a microwave-safe bowl and heat on high power for twenty seconds, then stir. Repeat once or twice as needed until almost all the chocolate is melted; the last bits of chocolate will melt just by stirring.
Just after the gelato is churned, drizzle the melted chocolate in a thin stream over the top and using a rubber spatula quickly fold it into the gelato to create ribbons of chocolate. Alternatively, drizzle the chocolate into the gelato two minutes before the churning is completed.
Transfer to an airtight container and freeze for at least two hours before serving.
 Tuesdays With Dorie is definitely ensuring that we have a least a few wonderful breakfasts this month: last week we had the divine Chocolate Chunk Muffins and this week we made Cream Scones. Not only do they have cream, they also have butter, yum! And I confess, mine also have a little bit of extra sugar; I actually doubled the sugar (it’s only a quarter cup total) because I thought Josh would like them better a bit sweeter. It worked: he’s worried he’s consuming them a bit too fast. Hey, better that then they go bad.

This week on the Problems & Questions there was a brilliant tip to grate the butter. Due to my fear of running out of baking supplies, I happened to have butter in my freezer, so it was extra-cold and easy to grate, and required very little mixing. The scones turned out marvelously soft and rich. My dear husband gave me this darling mini-scone pan ages ago and for some reason I had never gotten around to using it. I decided I better start, mostly out of fear that if I didn’t, he may never permit me to obtain another superfluous pan. The pan worked beautifully, baking the scones in exactly twenty minutes.

This recipe rated a 9 for Deliciousness and I gave it a 3 for Effort, for an EDR of 3. Many thanks to Lynne of Cafe LynnyLu for a splendid selection. You can find the recipe here on Lynne’s site and visit the Tuesdays With Dorie site to see how the rest of the bakers liked these gems.
 I haven’t participated with the Sweet Melissa Sundays group in months, but when I saw that my blogging buddy Gloria of The Gingersnap Girl selected Plum and Raspberry Pie with a Sweet Almond Lattice as this week’s recipe, I decided to bake-along. Who can say no to a pie at the height of summer fruit season? Also, making a lattice-top pie has been on my to-try list for a while. Unfortunately, making a pretty one still is!

I was really proud of myself early yesterday morning, thinking I was getting the hard work out of the way by making both the base pie dough and the lattice dough. Little did I know, that even after several hours in the refrigerator, plus another twenty minutes or so after I cut the strips, the lattice dough would be a crumbly mess to work with. I made two mini pies with a half recipe, which I thought would make the elusive lattice top a bit easier and in this instance, I was definitely wrong. I got lazy and ended up just haphazardly placing the strips on top of my mini pies.

The pies aren’t beautiful, but they definitely make up for it in taste. Gloria had said this recipe pairs perfectly with Melissa’s Brown Sugar Vanilla Ice Cream, so I decided to make it to have with the pie. (I’ve made this ice cream many times since it was originally chosen two years ago and it’s always a hit.) I’m glad I did, as the pie was a bit tart and it was nice to have something sweet to complement it. The pie rated a 9 for Deliciousness and I gave it a 5 for Effort for an EDR of 1.8. You can find the recipe here on Gloria’s site and visit the Sweet Melissa site to see how the other bakers fared.
 Josh and I celebrated Independence Day by getting up early to run a 4-mile race. There are a lot of road races on the fourth and it has become an unofficial tradition to run one before we consume copious amounts of holiday food. I have been fighting an injury for months, so I was especially happy that I am finally healed enough to run (short) races. Anyway, after the race we still had several hours before it was barbecue time and I had the chance to make this week’s Tuesdays With Dorie selection, Chocolate Chunk Muffins, as a mid-morning snack.

By not making the muffins until Monday, I benefited greatly from the Problems & Questions section. The consensus was they needed more chocolate and Leslie suggested subbing in a couple tablespoons of oil for the butter in order to prevent dryness (which seems to be pretty common with chocolate muffins), and with these two minor modifications, the muffins turned out excellent. I don’t think a “healthy” sprinkle of crunchy sugar hurt either. Yes, I know I just made a breakfast food even more sugary and decadent than it was supposed to be and I’m not sorry. I must comment that the batter seemed a little strange looking, almost sponge-like, but luckily that was not a problem once the muffins baked. Josh came into the kitchen when I was photographing the muffins and decided they would also be a good afternoon snack and he gives them a big thumb’s up.

We rated these muffins a 9 for Deliciousness and I rated them a 3 for Effort. Thanks to Bridget of The Way the Cookie Crumbles for a terrific selection. You can find the recipe here on Bridget’s site and see if the other bakers enjoyed them as much as we did by visiting the TWD site.